Welcome to the Pressure King Pro user manual. This guide helps you master your new kitchen essential for delicious, efficient, and safe cooking experiences. Enjoy!
1.1 Purpose of the User Manual
This manual is designed to guide you in safely and effectively using your Pressure King Pro. It provides detailed instructions, safety precautions, and troubleshooting tips to ensure optimal performance. Whether you’re a first-time user or an experienced cook, this manual will help you understand the appliance’s features, operation, and maintenance. It covers everything from initial setup to advanced cooking techniques, ensuring you get the most out of your Pressure King Pro. By following the guidelines, you can cook confidently, avoid common mistakes, and extend the lifespan of your appliance. This comprehensive guide is your key to mastering pressure cooking.
1.2 Intended Audience
This manual is designed for home cooks, professional chefs, and anyone seeking to utilize the Pressure King Pro effectively. It caters to individuals new to pressure cooking, offering clear guidance, as well as experienced users looking to optimize their skills. The instructions are tailored for those aiming to prepare healthy, flavorful meals efficiently. Whether you’re a busy parent, a culinary enthusiast, or someone focused on nutrition, this guide ensures safe and effective use of the Pressure King Pro. It’s a comprehensive resource for all users, regardless of their cooking experience or dietary preferences.
Safety Guidelines and Precautions
Always read this manual carefully. Understand pressure cooking risks, ensure proper venting, and follow safety tips to avoid accidents and ensure safe, efficient operation.
2.1 General Safety Tips
To ensure safe operation of the Pressure King Pro, always read this manual carefully before use. Place the cooker on a stable, heat-resistant surface away from children. Never leave the appliance unattended while in operation. Avoid touching hot surfaces, and use oven mitts or tongs to handle cookware. Keep the cooker away from flammable materials and avoid overheating. Regularly inspect the sealing ring and other parts for wear. Do not use abrasive cleaners or sharp objects that could damage the cooker. Follow recommended pressure and time guidelines to prevent over-pressurization. Always store the appliance with the lid removed to ensure proper drying.
2.2 Understanding Pressure Cooking Risks
Pressure cooking involves high temperatures and intense pressure, posing risks if not handled properly. Steam can cause severe burns, and improper sealing may lead to explosions. Always ensure the lid is securely locked and avoid overfilling the pot. Never force-open the lid while pressure is present. Allow steam to release naturally or via the valve. Keep children away and avoid touching hot surfaces. Regular maintenance, like checking seals and valves, is crucial to prevent malfunctions. Understanding these risks ensures safe and enjoyable cooking with your Pressure King Pro.
2.3 Proper Venting and Release Procedures

Proper venting and pressure release are crucial for safe operation. Always allow natural pressure release by letting the cooker cool slightly. For quick release, turn the valve counterclockwise slowly. Ensure the valve is clear of obstructions. Never force the lid open; wait until the float drops. Regularly clean the vent and valve to maintain function. Follow these steps to avoid accidents and ensure optimal performance. Always refer to the cooker’s indicators before attempting to open the lid. Proper venting prevents steam burns and maintains even cooking results. Keep children away during these processes. Safety is paramount when handling pressure release.

Product Overview
The Pressure King Pro is a versatile, efficient, and easy-to-use pressure cooker designed for home cooks and professional chefs. It offers multiple cooking options for delicious meals.
3.1 Key Features of the Pressure King Pro
The Pressure King Pro is a versatile, multi-functional electric pressure cooker designed for convenience and efficiency. It features a digital control panel with preset settings for various cooking modes, including pressure cooking, slow cooking, sautéing, and steaming. The appliance boasts a large, easy-to-read LCD display and a robust stainless steel construction for durability. It includes safety features like automatic pressure control and a secure locking lid to ensure safe operation; Additional highlights include a 24-hour delay start function, keep-warm mode, and a range of accessories like a steam basket and sealing ring for enhanced cooking versatility. Perfect for home cooks and professionals alike.
3.2 Components and Accessories
The Pressure King Pro comes with essential components and accessories to enhance your cooking experience. These include the main unit, inner pot, lid, sealing ring, steam basket, and recipe booklet. The inner pot is durable and non-stick, while the lid features a secure locking mechanism. The sealing ring ensures airtight pressure cooking, and the steam basket allows for healthy steaming. Additional accessories like a spatula and measuring cup may be included. Each part is designed for safe, efficient, and versatile cooking. Familiarize yourself with these components to make the most of your Pressure King Pro.
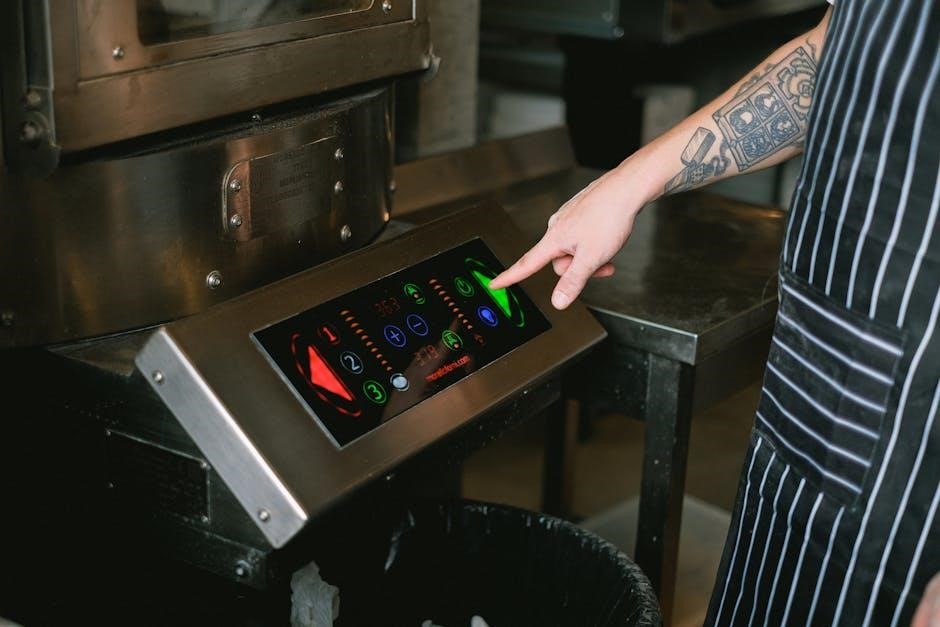
3.3 Control Panel and Button Functions
The Pressure King Pro features an intuitive control panel with buttons designed for easy navigation. The Power Button turns the device on/off, while the Menu Button cycles through cooking modes. The Plus (+) and Minus (-) buttons adjust time and pressure settings. The Start/Cancel Button initiates or stops the cooking process. Additional buttons include Keep Warm to maintain food temperature and Quick Release for manual pressure release. The LED display shows real-time status, ensuring precise control. Understanding these functions is key to optimizing your cooking experience with the Pressure King Pro.
Assembly and Preparation
Welcome to the assembly and preparation section. This guide will help you set up your Pressure King Pro for its first use effectively and safely.
4.1 Unboxing and Initial Inspection
When you unbox your Pressure King Pro, ensure all components are included and undamaged. Check for the main unit, lid, sealing ring, steam basket, and power cord. Inspect the appliance for any visible damage or defects. Verify that all accessories are in good condition and properly fitted. Before first use, examine the control panel, power cord, and seals for any signs of wear or damage. If any issues are found, contact customer support immediately. This initial inspection ensures safety and optimal performance. Take a moment to familiarize yourself with the layout and components to prepare for assembly and use.
4.2 Attaching Accessories (e.g., Sealing Ring, Steam Basket)
To ensure proper function, attach accessories correctly. The sealing ring should align with the lid’s groove and press firmly until it clicks. For the steam basket, place it at the bottom of the pot, ensuring it sits securely. Always check that accessories are in good condition before use. Refer to the diagram for visual guidance. Proper installation ensures safety and optimal performance; If unsure, consult the maintenance section for cleaning tips. Correctly fitted accessories prevent leaks and promote even cooking. Take your time to secure them properly for the best results. This step is crucial for safe and effective pressure cooking.
4.3 Preparing for First Use
Before using your Pressure King Pro for the first time, wash all components, including the inner pot, lid, and accessories, with warm soapy water. Dry thoroughly to prevent water spots. Plug in the appliance and perform a quick power-on test to ensure the control panel lights up. Run a test cycle with just water to familiarize yourself with its operation. Finally, ensure all parts are securely in place and the sealing ring is properly aligned. This preparation ensures a smooth and safe first cooking experience. Refer to the operating instructions for detailed cooking guidance.
Operating Instructions
Mastering your Pressure King Pro is simple with these operating instructions. Designed for ease, safety, and versatility, this guide ensures optimal performance and delicious results every time.
5.1 Setting Up the Pressure King Pro
Before first use, ensure the Pressure King Pro is placed on a stable, heat-resistant surface. Plug the power cord into a nearby outlet and ensure proper ventilation. Remove all packaging materials and inspect the unit for any damage. Place the inner pot into the cooker base, ensuring it fits securely. Familiarize yourself with the control panel and buttons. Check that the sealing ring is properly installed on the lid. Align the lid with the cooker base, ensuring it locks into place correctly. Perform a quick system check by pressing the power button to ensure all lights and displays function properly.
5.2 Selecting Cooking Modes (Manual, Preset, Delay Start)
The Pressure King Pro offers three convenient cooking modes to suit your needs. The Manual Mode allows you to customize cooking time and pressure settings for precise control. The Preset Mode provides quick, one-touch options for common dishes like soups, meats, and grains. For added flexibility, the Delay Start mode lets you schedule cooking up to 24 hours in advance. Simply select your preferred mode using the control panel buttons and follow the on-screen prompts to adjust settings as needed. This versatility ensures you can cook a wide variety of recipes with ease and convenience.

5.3 Adjusting Time and Pressure Settings
To adjust the time and pressure settings on your Pressure King Pro, navigate to the control panel. Use the ‘+’ and ‘-‘ buttons to increase or decrease the cooking time, displayed in minutes. For pressure, select from low, medium, or high settings, typically ranging from 5 to 15 PSI. Default settings are preset for common dishes, but you can customize based on your recipe. Tougher meats may require higher pressure and longer times, while delicate foods need lower settings. Always refer to recipe guidelines for specific instructions and ensure not to exceed the maximum pressure or time recommended in the manual.
5.4 Starting the Cooking Process
Once all settings are configured, ensure the lid is securely locked. Press the Start/Cancel button to begin cooking. The Pressure King Pro will automatically seal and start building pressure. Once pressure is reached, the timer will activate. Allow the machine to operate without interruption. After cooking completes, the appliance will automatically switch to the Keep Warm function. Always let the pressure release naturally or use the quick-release valve with caution. Never force-open the lid while pressure is present. The machine will signal when it’s safe to open. Follow these steps for safe and successful cooking every time.
Cooking Techniques and Tips
Discover essential cooking techniques and expert tips to enhance your culinary skills with the Pressure King Pro, ensuring delicious and consistent results every time you cook.
6.1 Basic Cooking Guidelines
Always measure ingredients accurately for best results. Add liquids as recommended to ensure proper steam generation. Season foods lightly before cooking. Trim excess fat from meats to prevent splatter. Secure the lid tightly to maintain pressure. Follow recommended cooking times and pressures for specific foods. Avoid overfilling the pot—leave at least 2-3 inches of space. Use the steam basket for delicate foods. Allow natural pressure release for 10-15 minutes before quick release for tender results. Always follow safety guidelines when handling hot components. Experiment with flavors but keep proportions balanced. Refer to the recipe guide for specific instructions.
6.2 Advanced Techniques for Optimal Results
Mastering advanced techniques with your Pressure King Pro can elevate your cooking to new heights. Try layering ingredients to control texture and flavor distribution. Use the sauté function to brown meats or caramelize vegetables before pressure cooking for enhanced taste. Experiment with natural and quick release methods to achieve desired doneness. For delicate foods, use shorter cooking times and gentle pressure settings. To prevent overcooking, stagger ingredient addition based on their cooking times. Finally, explore the delay start feature to plan meals in advance, ensuring perfectly cooked dishes every time; These techniques will help you unlock the full potential of your Pressure King Pro.
6.3 Common Mistakes to Avoid
- Overfilling the pot beyond the recommended level can lead to clogging and uneven cooking.
- Not using enough liquid may result in dry or burnt food.
- Forgetting to attach the sealing ring properly can prevent the lid from sealing.
- Not allowing natural pressure release can cause hot liquid to splatter.
- Ignoring preheating times may lead to undercooked meals.
- Using abrasive cleaners can damage the cooker’s finish.
- Storing the cooker while still wet can encourage mold growth.
Avoiding these mistakes ensures safe, efficient, and delicious cooking with your Pressure King Pro.

Maintenance and Care
Regular maintenance ensures optimal performance and longevity of your Pressure King Pro. Clean the appliance thoroughly, store it properly, and replace worn-out parts promptly.
7.1 Cleaning the Pressure King Pro
Regular cleaning is essential to maintain the performance and longevity of your Pressure King Pro. After each use, wash the inner pot, lid, and accessories with warm soapy water. Avoid using abrasive cleaners or scourers, as they may damage the surfaces. The sealing ring and steam basket should be rinsed thoroughly and dried to prevent moisture buildup. For tough stains, soak parts in warm water before cleaning. The exterior can be wiped with a damp cloth. Ensure all components are dry before storing to prevent rust or mold. Deep clean periodically by running a vinegar and water cycle to remove any residue.
7.2 Storing the Appliance

To maintain your Pressure King Pro, store it in a cool, dry place away from direct sunlight. Ensure the appliance is clean and dry before storage to prevent moisture buildup. Use the original packaging or a sturdy container to protect it from dust and damage. Avoid storing it near extreme temperatures or in humid environments. Keep the power cord neatly wrapped to prevent tangling. Store accessories separately in a labeled bag for easy access. Do not store food or liquids inside the appliance. Always keep it out of reach of children. Proper storage ensures longevity and optimal performance of your Pressure King Pro.

7.3 Replacing Parts and Accessories
To maintain your Pressure King Pro’s performance, replace worn or damaged parts promptly. Always use genuine Pressure King Pro accessories to ensure safety and compatibility. Order replacement parts directly from the manufacturer or authorized dealers to avoid counterfeit products. Before replacing any component, ensure the appliance is unplugged and cooled down. Refer to the manual for specific instructions or contact customer support for guidance. Regularly inspect seals, gaskets, and other wearable items to prevent leaks or malfunction. Proper replacement ensures optimal functionality, safety, and longevity of your Pressure King Pro. Always follow safety guidelines when handling electrical or pressurized components.
Troubleshooting Common Issues
Troubleshooting common issues with your Pressure King Pro is straightforward. Consult the error code list, check your user manual, or contact customer support for help.
8.1 Error Codes and Their Meanings
The Pressure King Pro displays error codes to indicate specific issues. E1 often signifies a lid alignment problem, while E2 may point to a faulty pressure sensor. E3 typically indicates excessive steam or a blocked vent. E4 suggests a temperature sensor malfunction, and E5 could mean a power supply issue. Refer to the error code list in this manual for detailed explanations. Addressing these codes promptly ensures optimal performance and safety. Always unplug the unit before attempting repairs and consult customer support if issues persist.
8.2 Resolving Pressure-Related Problems
If the Pressure King Pro isn’t building or releasing pressure correctly, check the sealing ring for proper alignment and ensure the lid is securely locked. Clear any blockages in the steam release valve or pipe. For pressure release issues, allow natural release to complete or use the quick release function carefully. If problems persist, inspect the gasket for wear and replace it if necessary. Regularly cleaning the valve and ensuring all parts are in good condition will help maintain optimal pressure performance. Always follow the manufacturer’s guidelines for pressure-related maintenance and troubleshooting to ensure safety and efficiency.
8.3 Addressing Heating or Sensor Issues
If the Pressure King Pro isn’t heating properly or the sensors malfunction, start by ensuring the power supply is stable and the plug is securely connected. Check for blockages in the heating element or sensors, and clean them gently with a soft brush. If the issue persists, reset the appliance by unplugging it for 30 minutes. For sensor-related problems, ensure the lid is aligned correctly and the sealing ring is intact. If the appliance overheats, allow it to cool down before restarting. If none of these steps resolve the issue, contact customer support for further assistance or potential repairs.

Warranty and Customer Support
The Pressure King Pro is backed by a comprehensive warranty and dedicated customer support team, available via phone, email, or website for all your inquiries and troubleshooting needs.
9.1 Understanding the Warranty Terms
Your Pressure King Pro is backed by a limited warranty covering manufacturing defects in materials and workmanship for a specified period. The warranty is valid for the original purchaser and includes repairs or replacements at no additional cost. Coverage typically lasts for one or two years, depending on the model and region. Exclusions may apply for misuse, normal wear, or unauthorized modifications. For full details, refer to the warranty document provided with your purchase or visit the manufacturer’s official website. Understanding these terms ensures you can enjoy your appliance with confidence and peace of mind.
9.2 Contacting Customer Service
For any inquiries, concerns, or assistance, contact our dedicated customer service team. Reach us via phone at 1-800-XXX-XXXX (Monday-Friday, 9 AM-5 PM EST) or email at support@pressurekingpro;com. Visit our website at www.pressurekingpro.com/support for FAQs, troubleshooting guides, and downloadable resources. Ensure you have your product serial number ready for faster assistance. Our team is committed to providing timely and effective support to enhance your Pressure King Pro experience.
Congratulations! You’re now ready to unlock the full potential of your Pressure King Pro; Happy cooking and enjoy creating delicious meals with ease!
10.1 Final Tips for Getting the Most Out of Your Pressure King Pro
To maximize your Pressure King Pro experience, experiment with various cooking modes and settings to find what works best for different dishes. Regularly clean and maintain the appliance to ensure optimal performance. Explore new recipes online or through cookbooks designed for pressure cookers to expand your culinary skills. Utilize the delay start feature for convenient meal planning. Don’t hesitate to try new ingredients or adjust cooking times based on personal preferences. By following these tips, you’ll enhance your cooking experience and make the most of your Pressure King Pro.
10.2 Encouragement to Experiment and Explore
Don’t be afraid to push your culinary boundaries with the Pressure King Pro! Experiment with new recipes, flavors, and techniques to unlock endless possibilities. Whether you’re a novice or an experienced cook, this appliance invites creativity. Try adapting family favorites or exploring global cuisines—its versatility ensures success. Remember, practice makes perfect, so don’t hesitate to test new ideas. For inspiration, refer to the manual’s tips or explore online resources. Embrace the joy of cooking and make the Pressure King Pro your partner in creating memorable meals for years to come. Happy cooking and bon appétit!